Silicone sealant is essential for waterproofing showers, bathrooms, and kitchens—but over time, it can develop mould in damp environments. Understanding why this happens and how to prevent it can save you time and keep your wet areas looking fresh.
Not all silicone is created equal. Choose a premium silicone sealant with anti-fungal properties. High-quality products are less likely to crack or lose adhesion, reducing trapped moisture and preventing mould growth.
Before applying silicone, make sure the area is clean, dry, and free of grease or soap residue. Any dirt or grime can prevent a solid bond, allowing water to seep behind the sealant and create mould-friendly conditions.
Most silicone requires 24 hours to cure fully. Patience is key—this curing period ensures a strong, waterproof seal that resists mould.
Regular cleaning prevents soap scum and grime buildup, which are breeding grounds for mould. Avoid harsh chemicals like bleach, which can weaken silicone. Instead, use natural cleaners like soapy water or a vinegar solution (two parts vinegar to one part water).
Once mould appears inside silicone, it cannot be fully removed. The only solution is to remove and replace the sealant, clean the area, and allow it to dry before reapplying new silicone.
Choosing the right silicone colour is an important finishing touch that can make a big difference to the overall look of your bathroom, kitchen or tiled area. The right choice helps create a seamless finish, while the wrong colour can stand out and disrupt the design.
In this article, we’re going to take you through the key points to think about when choosing the correct caulking colour. These tips, along with our reusable silicone extension nozzles, will help you get the perfect finish, whatever your project or room.
Selecting the right silicone colour is a small detail that can have a big impact, helping your finished project look polished, refined, and professionally completed.
Caulking is more than just sealing gaps—it’s the finishing touch that makes your bathroom, kitchen, or wet area look polished. Follow these tips to get a clean, long-lasting result.
Before applying silicone, make sure the surface is dry, clean, and free of dust or debris. This ensures the sealant bonds properly and prevents dirt from smearing into the silicone.
Trim the nozzle to match the size of the gap you’re sealing. The right size helps you apply an even bead and reduces mess.
An even bead of silicone makes it easier to trowel off excess. Avoid overfilling—nobody wants to clean up extra silicone!
Spraying the surface lightly before troweling prevents silicone from sticking to unwanted areas. A diluted, non-citrus dishwashing liquid like Morning Fresh works well, leaving a smooth, professional finish.
Most silicone requires 24 hours to fully cure before cleaning or using the area.
Some cleaners can damage silicone. Always check product instructions before using near caulked areas to avoid discolouration or weakening the seal.
Pro Tip: Proper caulking can transform the look of any space. Take your time and ensure each joint is neat and precise—you’ll be amazed at the difference!
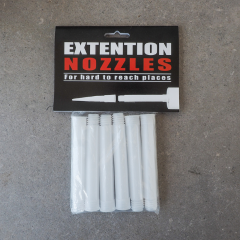
Applying silicone in tight spaces like behind basins, baths, vanities, downpipes, or under door sills can be frustrating with standard nozzles. That’s why we designed a range of extension nozzles to make sealant application easier and more precise.
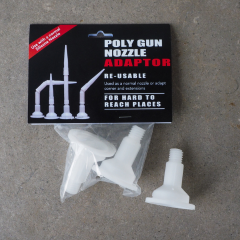
Our extension nozzles can be screwed together to achieve the required length or angle, allowing you to reach even the most difficult areas. They are compatible with all silicone cartridges and standard poly gun nozzle adaptors.
The poly gun nozzle is reusable—simply let the sealant dry, twist off the adaptor, and replace the nozzle tip. Multiple extension nozzles can also be combined with 45–90° corner nozzles, giving you maximum reach and flexibility for complex applications.
Built with a rigid, durable design, our extension nozzles allow you to keep both hands on the caulking gun for better control and a professional finish every time.
Pro Tip: These nozzles are perfect for professional installers or DIY enthusiasts looking for a clean, precise seal in those hard-to-access areas.